Problem: You capture screenshots and end up with scattered images that look unpolished and off-brand. That wastes time, fragments campaigns, and leaves social feeds that don’t convert.
Agitation: It’s frustrating—deadlines loom, creative resources are thin, and your posts need consistent visuals fast. You’ve tried generic editors and hefty design suites, but they slow you down and add extra steps.
Solution: I’ve used a tool built to turn raw screenshots into polished marketing assets. It combines AI-powered automation, a straightforward interface, ready templates, and export-ready media for social media and web banners.
I’ll walk you through its core features, real-world results, and the practical pricing (yes—there’s a Pro tier that changes the math). You’ll see how it fits the current AI landscape and why marketers and creators should care.
I’ve tested the capture-to-publish flow and found it speeds content production while keeping branding tight. Ready to see how it works? Let’s dive in.
Key Takeaways: Pika.style Review
- Turn screenshots into on-brand visuals fast — great for marketers and founders.
- AI tools and templates simplify image generation and media exports.
- Cleaner workflow: capture, edit, template, export — fewer steps to publish.
- Practical pricing tiers make budgeting simple for teams.
- I’ll compare alternatives and share a hands-on case so you can decide to try pika.
Introduction to Pika.style: Where It Fits in Today’s AI Design Landscape
If you need consistent social graphics fast, this product sits where capture meets design. In a crowded field of AI tools, it narrows the focus: turn website screenshots into ready-to-post visuals without a heavy editor.
I’ve used it for campaign headers and quick feature shots. The founder, Rishi Mohan, built the platform to speed repeatable visual creation—powered by an API, a Chrome extension, templates, and a simple editor.
It’s important to note the difference: pika labs centers on video generation and video content (versions like Pika 1.5 and 2.2), while this product doubles down on image workflows.
- Who benefits: marketers, content teams, founders who need on-brand banners and post images fast.
- Why it works: features like templates, API automation, and tight support make capture-to-export simple.
Bottom line: if you’ve been juggling multiple apps for grabs-and-edit, this platform consolidates creation and keeps brand visuals consistent.
What is Pika.style?
Imagine capturing a page and getting a publish-ready image without opening a heavy editor. That’s the promise from founder Rishi Mohan: a focused workflow that converts screenshots and element captures into marketing-ready images fast.
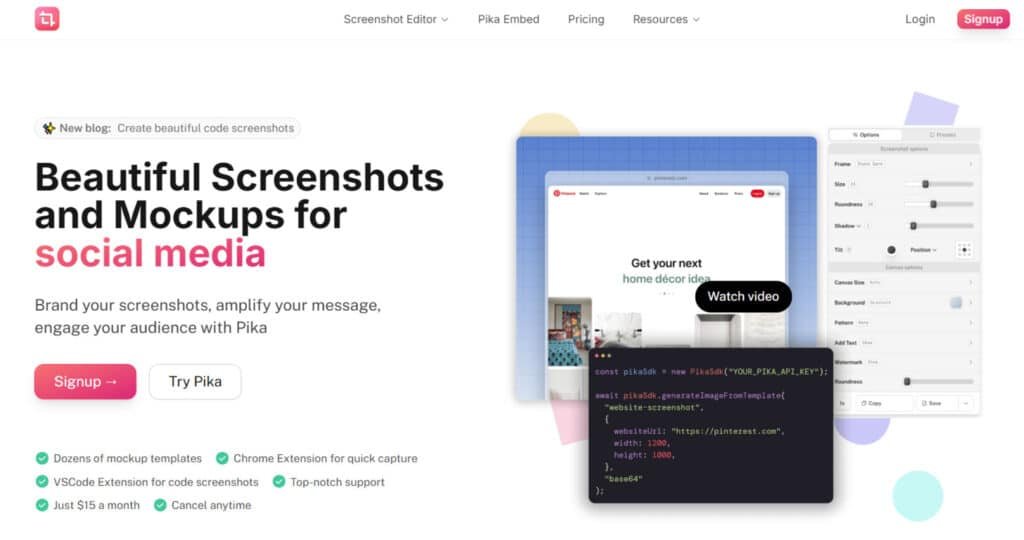
The product combines a Chrome extension, ready templates, a built-in editor, and the Pika API for bulk image generation. You capture a full page or a single element, pick a template, then crop, add text or brand elements, and export. The editor gives you practical control—crop, annotate, and layer—without a steep learning curve.
Who benefits? Marketers, content teams, founders, and product marketers who need speed, consistency, and on-brand visuals. For recurring assets (blog covers, hero banners, promo cards), the API and SDKs automate repetitive work so teams scale design without redoing layouts.
“I built this to make capture-to-creative fast and repeatable,” — Rishi Mohan
- Capture: Chrome extension for element or full-page screenshots.
- Create: Templates + editor to add text, annotate, and align to brand rules.
- Scale: API and SDKs for bulk production and standardized media.
How it differs from pika labs and broad design suites: Pika.style focuses on static images and marketing media (not video generation like pika 1.5 or later versions). If your workflow is image-first and you want easy use with consistent results, this tool removes extra steps and keeps teams on brand.
Best Features
Below I highlight the features that speed production and keep your brand consistent across channels.
1. Core Screenshot Editor
The Core Screenshot Editor forms the foundation of Pika, enabling users to create, customize, and export high-quality screenshots and mockups tailored for marketing, social media, and professional articles.
Designed for seamless editing, this tool allows users to craft visually appealing images with ease, making it the choice for professionals seeking efficiency. All processing occurs locally in the browser, ensuring privacy as no images are sent to or stored on servers.
The editor follows a streamlined three-step workflow: add a screenshot, enhance it with customizations, and export it.
To use Pika is to leverage its intuitive interface, which supports instant customization by applying the last used settings automatically, saving time during editing.
Keyboard shortcuts enhance productivity, such as ⌘+V/Ctrl+V for pasting images, ⌘+C/Ctrl+C for copying, and ⌘+S/Ctrl+S for saving.
- Input Options: Users can add screenshots through multiple methods: pasting from the clipboard (⌘+V/Ctrl+V), uploading from the local system via an “Add your image” button, capturing directly from a website URL (supporting full-page or mobile views), or using a demo image to explore the app’s capabilities. This flexibility ensures Pika caters to diverse workflows, from quick captures to detailed mockup creation.
- Export Capabilities: Images can be exported in high-resolution formats optimized for platforms like Twitter, Instagram, or App Store, with support for custom sizes. Users can copy images to the clipboard (⌘+C/Ctrl+C) or save them to their system (⌘+S/Ctrl+S), ensuring compatibility with various styles of social media and professional use cases.
2. Customization Options
Pika’s Customization Options empower users to enhance screenshots with precision, offering a range of tools to tailor visuals for professional presentation.
These features Pika provides allow for creative control, making it ideal for users aiming to produce polished designs in various styles.
Whether creating a simple screenshot or a complex marketing asset, the app delivers robust editing capabilities through an intuitive interface.
- Frame Customization: Add professionally crafted browser or device frames (e.g., macOS, Windows) to elevate screenshots, ideal for app previews or website mockups. Pro subscribers unlock an expanded library of frames for diverse design needs.
- Size Adjustment: Scale screenshots with a default setting of 100, enabling precise resizing to fit specific dimensions or maintain original proportions.
- Roundness: Adjust border radius (default: 16) to create rounded corners, enhancing visual polish.
- Shadow: Apply drop shadows (default intensity: 3) to add depth and focus to screenshots.
- Inset: Incorporate inner shadow or padding effects to refine the screenshot’s appearance within its frame.
- Rotate: Rotate screenshots for dynamic layouts or creative angles.
- Tilt (Pro Feature): Apply perspective tilting for a 3D effect, exclusive to Pro subscribers, enhancing marketing assets.
- Position: Adjust screenshot placement on the canvas for precise alignment, ensuring cohesive designs.
3. Canvas and Background Customization
The Canvas and Background Customization tools allow users to design the backdrop of their screenshots, tailoring dimensions and aesthetics to suit specific platforms or creative visions.
To use Pika for canvas customization is to access a versatile set of options that elevate the overall presentation of images.
- Canvas Size: Select predefined sizes optimized for social media (e.g., tweets, Instagram posts/stories, App Store, Open Graph) or set custom dimensions for unique requirements.
- Background Options: Choose from curated gradient backgrounds for a modern look, apply patterns to emulate Photoshop/Figma-like effects, or upload custom images (Pro feature) for personalized styles. These options ensure screenshots stand out in professional contexts.
- Canvas Roundness: Adjust the canvas’s corner radius to create rounded edges, complementing the screenshot’s design.
- Noise: Add subtle texture overlays to the canvas, enhancing visual depth and sophistication.
4. Annotations and Layers
Pika’s Annotations and Layers feature enables users to add text, watermarks, and shapes, creating complex designs with minimal effort.
This is particularly valuable for branding and highlighting key elements in marketing materials.
- Text Layers: Insert customizable text for labels, titles, or captions, with adjustable font, size, and placement.
- Watermark (Pro Feature): Add logos, website links, or social media handles to brand images securely, available only to Pro subscribers.
- Shapes: Include geometric shapes (e.g., circles, rectangles) to highlight elements or enhance design complexity.
- Layer Management: Arrange and customize layers to create sophisticated mockups, offering flexibility for intricate compositions.
5. Presets
The Presets feature streamlines workflows by allowing users to save custom settings for reuse, making Pika a time-saving tool for frequent designers.
- Preset Saving: Save combinations of customizations (e.g., frame, background, shadow settings) as reusable presets, stored locally in the browser.
- Automatic Application: Pika automatically applies the last used settings or selected presets to new screenshots, reducing repetitive adjustments and enhancing efficiency.
6. Templates
Pika’s Templates enable rapid creation of use-case-specific mockups and images, with dozens of options designed for efficiency. These templates are ideal for users seeking quick, professional results.
- Template Categories: Include App Store images, tweets, social media posts, code screenshots, and marketing styles (e.g., browser or device mockups). Templates support platforms like Instagram, Open Graph, and professional website previews.
- Customization: Each template includes adjustable settings like backgrounds, frames, and shadows. Free users access basic templates, while Pro subscribers unlock all templates, including advanced variants with tilting and watermarks.
- Accessibility: Available via the templates directory, with Pro features marked by a ⚡️ symbol.
7. Extensions and Workflow Tools
Pika’s Extensions and Workflow Tools integrate with popular environments, accelerating screenshot capture and editing for developers and designers.
- Chrome Extension: Captures active tab screenshots and opens them in Pika for immediate customization, streamlining web-based workflows.
- VSCode Extension: Generates code screenshots directly from Visual Studio Code, perfect for sharing snippets or documentation.
- Raycast Extension: Imports system images into Pika via the Raycast launcher (macOS-focused), enhancing accessibility for macOS users.
8. Pika Embed
Pika Embed allows third-party applications to integrate the full screenshot editor, enabling in-app image creation and editing without custom development.
- Integration Method: Embed via an iframe tag; the parent app communicates using event listeners to receive exported images as base64 files.
- Customization: Control input images, editor themes, and appearance to align with the host app’s branding, with dedicated instances per app.
- Features Included: Provides access to all editor tools (frames, backgrounds, text, watermarks, etc.), eliminating the need to build an image editor.
- Benefits: Saves development time, ensures maintenance-free updates, and delivers seamless user experiences. Used by startups like Taplio and TweetHunter.
- Setup: Requires contacting Pika for a custom instance; no public pricing provided.
9. Pika API
The Pika API enables programmatic generation of screenshots and mockups, ideal for automation and backend integration.
- Functionality: Dynamically create images using all editor features (e.g., frames, backgrounds, watermarks) via API calls.
- Use Cases: Automate marketing asset creation or integrate with SaaS platforms for scalable image generation.
- Access: Exclusive to Pro subscribers, supporting advanced automation needs.
10. Privacy and Performance
Privacy and Performance features ensure Pika is secure and efficient, making it a reliable choice for users.
- Local Processing: All image processing occurs locally in the browser, ensuring no images are sent to or stored on servers for maximum privacy.
- No Account Required: Basic features are accessible without an account; accounts are needed only for saving presets or accessing Pro features.
- Performance: Automatic application of prior settings and presets minimizes repetitive tasks, while local processing ensures fast rendering.
11. Support and Community
Pika’s Support and Community offerings enhance its reliability, ensuring users can use Pika with confidence.
- Customer Support: Top-notch assistance via email (hi@pika.style) or Twitter DMs for bug reports, suggestions, or inquiries.
- Community Trust: Used by over 8,000 users, including Y Combinator startups and companies like Trunk.io, Paddle.com, Readwise.io, and Incident.io. Testimonials praise time savings and professional results (e.g., Caleb Leigh: “Converted me from any other screenshot tool”; Thomas Frank: “Huge fan, cuts corners for blog images”).
- No Lifetime Subscription: Pika focuses on a subscription model to ensure continuous updates and support for its app.
| Feature | Primary Benefit | Marketing Outcome |
| API generation | Automates batch renders | Scale content calendars |
| Extension | Instant captures | Faster creatives |
| Templates & SDKs | Reusable layouts + integrations | Consistent brand control |
Pricing and Plans
Pricing should be simple — here’s how the plans break down for creators and teams in 2025. I’ll keep this short and practical so you can decide fast.
Free vs Pro: What you get and where limits apply
The free plan is ideal for testing capture-to-design flows. You can try templates, the Chrome extension, and basic exports.
Expect limits: fewer API calls, editor caps, and watermarked images on some outputs. That makes the Pro tier the sensible option for weekly publishing.
Pro plan
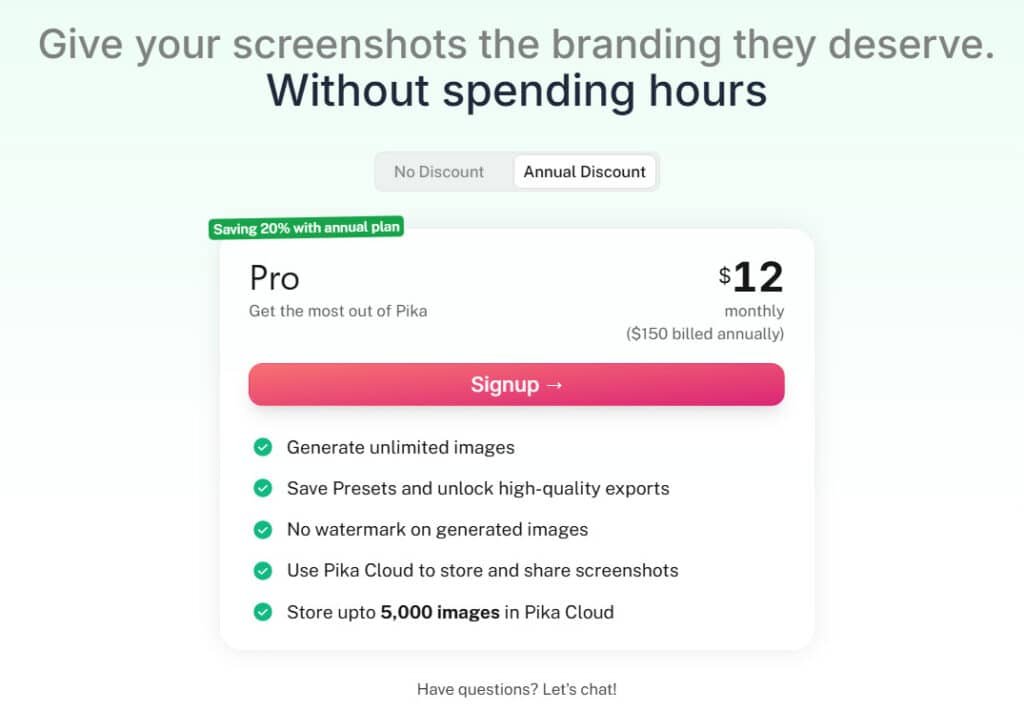
$15/month ($12/month (Saving 20% with annual plan)): Unlimited editor images, no watermark, 2,500 API images
At $15/month the Pro plan unlocks unlimited exports from the editor, removes watermarks, and grants 2,500 API images per month.
This is strong value if you run recurring marketing tasks. For solo creators, it’s cheaper than many all-in-one suites when you mainly need fast capture-to-post speed.
- Teams: predictable output and clean exports reduce rework and last-minute panics.
- Automation: the API quota is the lever — plan your monthly volume to avoid surprises.
- Support: Pro users can expect faster responses, which matters for mission-critical campaigns.
Options are simple: start free to map needs, then upgrade when your monthly API or editor use justifies the cost. In short — the pricing favors speed, automation, and consistent deliverables.
Pros & Cons
Here’s a clear look at what works well—and where it falls short.
Pros: The AI-powered image flows and API access speed up production. Templates and specialized screenshot tools cut tool switching and save hours. Teams report faster workflows and higher engagement after adoption.
Pros: The editor gives practical control for text and annotations. The Pro plan removes watermarks and adds a meaningful API quota—good value for frequent publishers.
- Fast capture-to-design workflow with robust templates and automation for repeatable assets.
- Specialized capture tools reduce separate utilities; editor covers common marketing use cases.
- Consistent output helps multi-channel campaigns stay on brand.
Cons: There is a noticeable learning curve for the API and some advanced features. For teams wanting edge-case control or offline editing, the tradeoff for speed can feel limiting.
Cons: Pricing may be high for casual users. And, as with any AI-driven flow, you still need human QA for final polish.
| Aspect | Benefit | Drawback |
|---|---|---|
| Automation & API | Scale assets quickly | Steeper learning curve for setup |
| Templates & Editor | Fast, consistent visuals | Less offline/manual control |
| Support & Onboarding | Good response for Pro users | Initial help may be needed for complex flows |
My experience: the balance of features and control fits marketers well. If those cons matter, continue to Alternatives for broader suites or niche capture tools.
Alternatives to Consider
If you need a different mix of speed, control, or cinematic motion, these alternatives give clear options so you pick the right tool for your workflow.
Canva: Broad design suite with massive template library
Canva is user-friendly and has a huge template library. It covers many media formats beyond simple captures, so non-designers ship polished assets fast.
Best when you need many formats and quick templates.
Adobe Creative Cloud: Pro-grade control
Adobe Creative Cloud wins on deep control and extensibility. Expect a steeper learning curve and higher cost, but it’s unmatched for complex composites and plugin workflows.
Snagit: Fast screen capture and annotation
Snagit is focused and reliable for quick captures, arrows, and callouts. If your main need is precise screenshots and edits, this tool keeps things simple and fast.
Greenshot: Open-source basic capture
Greenshot is a solid free option for basic capture needs. Pair it with a layout app if you want polished outputs—this is a cost-effective starting point.
Pika Labs: AI video generator for motion
Pika Labs excels if your priority is video generation. Its video generator features (text-to-video, image-to-video and versions like Pika 1.5/2.2) produce realistic motion for video content.
If your team splits time between static images and filmic media, use a fast capture tool for images and a dedicated video tool for motion. That combo covers speed, automation, and cinematic results.
- Canva: best template library and approachable UI.
- Adobe: deep control for advanced creative work.
- Snagit/Greenshot: focused capture options—paid and free.
- Pika Labs: pick it when you need high-quality video generation.
How Pika.style Benefits Ideal Users
Teams and creators get a repeatable path from browser capture to published visual in minutes. I’ve used the extension, templates, and API to speed projects and cut handoffs.
Marketing teams: Faster campaign visuals and consistent branding
Marketing teams get a ready pipeline—capture with the extension, pick a template, and ship on-brand images without waiting on a design queue.
Faster campaign cycles mean you spend time on message, not formatting. API automation can pre-generate assets for launches and newsletters, saving serious time.
Founders and creators: Quick social media graphics in seconds
For founders and creators, it’s easy create social media visuals in seconds—ideal when you wear multiple hats. The editor’s text and annotation tools let you explain updates right on the screenshot.
Once templates are dialed in, recurring formats rinse-and-repeat. The result: consistent creation speed, fewer bottlenecks, and cleaner brand media across channels.
| User | Primary Benefit | Typical Result |
|---|---|---|
| Marketing teams | Pipeline: capture → template → export | Faster campaigns, consistent branding |
| Founders | Quick social images and annotations | Less design overhead, faster posts |
| Creators | API + editor for repeatable assets | Predictable output for projects and launches |
Case Study / Personal Experience
I ran a short experiment to measure how a focused visuals refresh affects engagement across blog posts and key landing pages.
Real-world results: Higher engagement after a web visuals refresh
Outcome: after replacing scattered screenshots with templated images, page time-on-site rose and click-throughs improved noticeably. Cleaner imagery made headlines and CTAs easier to scan.
My experience: From scattered screenshots to on-brand assets in minutes
I moved from chaotic captures to consistent posts by using templates and the built-in editor. Once headers were templatized, a week’s worth of visuals took minutes instead of hours.
For a tutorial series I captured steps, annotated flows, and exported in seconds. Collaboration became simple — share drafts, gather comments, finalize without email ping-pong.
Workflow snapshot: API + WebTemplates + editor for content ops
The pipeline was straightforward: capture with the extension, polish in the editor, then batch-generate variants via the API for multi-channel content and media campaigns.
- The API produced blog covers and feature highlights at scale.
- Templates enforced branding and sped production.
- Editor annotations clarified UI points for readers.
“Batch generation saved repetitive work and freed time for UX and messaging improvements.”
If you want a low-friction test, try pika on one content stream. Expect a short learning curve, measurable gains, and more time to focus on message. Then, if it fits, try pika on more assets.
Who Should Choose Pika.style vs. Other Tools
Deciding between an image-first workflow and a full motion pipeline comes down to a few clear trade-offs. I’ve used both approaches and here’s how I’d pick for your team.
Choose this tool if you value speed, templates, and automated image workflows
Pick it when you need repeatable outputs fast. The capture → template → export flow reduces handoffs and keeps brand assets consistent.
Good fit for: marketers, founders, and content teams who want easy use, minimal friction, and clear automation via an API.
Consider video-first tools if your priority is AI motion
If your roadmap requires video generation—text-to-video, image-to-video, or longer edits—look to dedicated solutions.
- pika labs is a fast entry for short clips and quick edits (updates like pika 1.5 improved coherence).
- Basedlabs offers avatars and scripting for professional campaigns, but expect a steeper learning curve and more advanced features.
My take: run this product for static banners, hero images, and weekly social assets. Add a video generator or video tool in parallel when you need motion. The interface and learning needs here are modest; the main setup time is around API automation if you scale.
Conclusion: Pika.style Review
Before you commit, here’s a compact takeaway to help you decide and act fast.
I find this tool delivers quick wins: a Chrome extension, API automation, templates, and a built-in editor that speed image creation and keep branding consistent. The Pro plan ($15/month) removes watermarks, adds unlimited editor exports and 2,500 API images—good value for frequent publishers.
If you want to try Pika, start on the free plan to test exports and workflow. Then scale when the time savings and cohesion justify the upgrade.
Final take: for image-first teams and solo creators this tool shortens production time and improves campaign visuals. Next, I’ll answer the most frequently asked questions to help you move from interest to implementation.
Frequently Asked Questions
What does this tool do and who is it best for?
It converts screenshots and simple inputs into polished marketing visuals—think social posts, web headers, and hero banners. I find it most useful for marketers, content teams, founders, and product marketers who need fast, on-brand assets without a deep design workflow.
How does it differ from Pika Labs and other AI video generators?
This product focuses on static image and mockup generation, templates, and screenshot-based editing. Pika Labs and similar services prioritize AI video creation (Pika 1.5 / 2.2-style models). Choose the image-first platform for banners and social images; pick video-first tools when motion content is the goal.
Is there a free plan and what are the limits?
Yes—there’s a free tier suitable for light, occasional use. It typically includes basic editor access and watermarked exports. For regular production or remove-watermark needs you’ll want a paid plan (the Pro tier is a common upgrade path).
What does the Pro plan include and is it worth $15/month?
The Pro plan usually offers unlimited editor images, no watermark, and a generous API quota (around 2,500 images). If you need consistent, branded assets at scale, I find the monthly cost reasonable compared with the time you save.
Can I automate image generation via API or SDKs?
Yes. There’s an API and developer SDKs for automated and bulk image production—handy for content ops, marketing automation, and integrating image creation into your build or CMS workflows.
How good is the screenshot capture and editor (Chrome extension)?
The Chrome extension captures full pages and element-level screenshots and includes a built-in editor for crop, annotate, text overlays, and brand elements. It’s quick and practical—ideal when you need polished results from live pages.
Are there ready-made templates for social and web use?
Yes—there’s a library of templates for social posts, blog headers, and marketing banners. I use these templates to maintain visual consistency and speed up campaign production.
How steep is the learning curve? Will my team pick it up fast?
The interface is straightforward for basic tasks—most users learn key features within minutes. Advanced workflows (API integration, style customization) require a bit more time, so expect a modest learning curve for developers and power users.
Can it handle bulk production and brand standardization?
Absolutely. Time-saving automation and API support let you standardize visuals at scale—useful for large campaigns and multi-channel consistency.
What file formats and export options are available?
You can export common image formats (PNG, JPG, often SVG for certain elements) and download assets optimized for social or web. The editor also supports layered edits and text overlays for quick tweaks.
How does support and documentation look for developers?
Documentation for the API and SDKs is generally solid with examples and quickstart guides. Developer support channels vary by plan—paid tiers usually include faster assistance or dedicated support options.
Are there notable alternatives I should evaluate?
Yes—Canva for broad templates and ease, Adobe Creative Cloud for pro control, Snagit for focused screen capture, and Greenshot as an open-source capture tool. For video needs, check Pika Labs and other AI video generators.
Is image generation quality good for professional use?
Image quality is strong for marketing assets and mockups. For pixel-perfect or high-end design work, some teams still prefer Adobe tools—but for speed and consistency, this platform strikes a great balance.
Can I use it for social media video content?
It’s primarily image-focused. If you need AI video generation, use a dedicated video-first tool. For short animated assets or simple GIF-like exports, check whether the editor supports lightweight motion features.
How much creative control does the editor provide?
The editor offers direct control over crops, annotations, brand elements, text, and template parameters. For deep visual editing you’ll still rely on traditional design apps, but for fast, on-brand output it’s quite capable.
Will this integrate with our marketing stack and CMS?
Yes—API and SDK options let you plug image generation into your CMS, automation tools, and content pipelines so you can produce assets programmatically for campaigns.
Are there privacy or content ownership concerns?
Review the platform’s terms—most modern services grant usage rights for generated assets, but always confirm data handling and content ownership clauses, especially if you automate via API.
Can I try advanced features before committing?
Many platforms offer trial periods or a limited Pro trial. I recommend testing template exports, API calls, and the Chrome extension workflows to validate fit before upgrading.
